This article is a guest post by Jim Lucas
Do you think I would learn my lessons about not using traditional/standard methods? No… the point of this is to find the surface area of a cross section. This can also be found by performing a cut in part mode. Why do I insist on using non-traditional methods? I will say that I do feel more comfortable in part mode- BUT I think the larger reason is that I get a bit of an adrenaline rush from going this way… In a weird way, this keeps me on-edge and helps me stay alert during the exam.
Either in drawing view or out a simple sketch can be created for the section view. Both work in a similar fashion, in part mode a closed sketch and a cut extrude will produce a custom cross section.
In drawings the only difference is that the sketch can be an open line instead of a closed sketch (still dimensioned to the relevant edges). After selecting section view you can draw or select the relevant section line.
 |
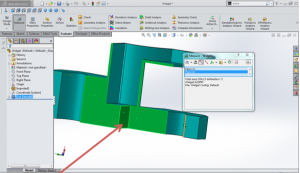
| The noted surface is invisible in the drawing view – but still measured in the cross section |
Then measure the requested cross sections. One benefit of using the part view is that it is easier to understand exactly what is being measured. Take a look at the above image to fully understand.
Learn How To Pass The CSWE – See The Complete Article Series
Jim is a CSWP and on the road to getting his CSWE. He works for HawkRidge Systems, an authorized reseller of SolidWorks. Jim also runs i-elf, a product development consulting company. He can be reached at Jim.Lucas@i-elf.com.


Easier to just insert the model relative to model to get a true FRONT VIEW then draw the three lines need and dimension according to test drawing. Highlight all three lines then select SECTION VIEW. It will ask if you want foreshortened or aligned, select aligned. Then measure the cross section area for your answer.
Took me awhile to find the “real” solution to this problem, here it is, in case anyone needs it:
https://forum.solidworks.com/thread/107677